lunes, 18 de abril de 2016

Authentic Baguettes at Home

Why this recipe works:

For a homemade baguette that rivals the best from Parisian boulangeries, we took a trip to France to learn firsthand what it takes. The problem with most published recipes, we discovered, is that all the small details that matter are glossed over. For an authentic wheaty flavor, we add a bit of whole-wheat flour (sifted to remove some of the larger pieces of bran that would otherwise add bitterness and make the loaf dense) to the white flour. Mixing the dough in a machine and then using a series of gentle folds to develop the dough creates the perfect tender, irregular internal crumb. Next we employ a long, slow rise in the refrigerator, which delivers the complex flavor of fermentation while making the recipe flexible, since we can bake the loaves anytime within a three-day window. To shape the loaves perfectly without overworking the dough, we employ a multistep approach that gradually transforms them into baguettes. Finally, we ensure a crispy, crackly crust by moistening the couche, the pleated linen cloth that holds the loaves as they proof, and by starting the loaves beneath a pair of upturned disposable roasting pans to trap steam as it evaporates from the exterior of the dough.
less

Authentic Baguettes at Home

Most American baguettes are doughy and pale, and the recipes we found weren’t much better. To get it right, we went to Paris to learn from the masters. Watch the Video

Makes four 15-inch-long baguettes

If you can’t find King Arthur all-purpose flour, substitute bread flour. For best results, weigh your ingredients. This recipe makes enough dough for four loaves, which can be baked anytime during the 24- to 72-hour window after placing the dough in the fridge. For tips on folding and slashing, see "Why Some Bread Doughs Are Folded" and "Slashing Rustic Loaves" under related content. It's essential to watch our video on making baguettes.

Ingredients

  • 1/4 cup (1 1/3 ounces) whole-wheat flour
  • 3 cups (15 ounces) King Arthur all-purpose flour
  • 1 1/2 teaspoon salt
  • 1 teaspoon instant or rapid-rise yeast
  • 1 teaspoon diastatic malt powder (optional)
  • 1 1/2 cups (12 ounces) water
  • 2 (16 by 12-inch) disposable aluminum roasting pans

Instructions


  1. 1. Sift whole-wheat flour through fine-mesh strainer into bowl of stand mixer; discard bran remaining in strainer. Add all-purpose flour, salt, yeast, and malt powder, if using, to mixer bowl. Fit stand mixer with dough hook, add water, and knead on low speed until cohesive dough forms and no dry flour remains, 5 to 7 minutes. Transfer dough to lightly oiled large bowl, cover with plastic wrap, and let rest at room temperature for 30 minutes.
    2. Holding edge of dough with your fingertips, fold dough over itself by gently lifting and folding edge of dough toward center. Turn bowl 45 degrees; fold again. Turn bowl and fold dough 6 more times (total of 8 folds). Cover with plastic and let rise for 30 minutes. Repeat folding and rising every 30 minutes, 3 more times. After fourth set of folds, cover bowl tightly with plastic and refrigerate for at least 24 hours or up to 72 hours.
    3. Transfer dough to lightly floured counter, pat into 8-inch square (do not deflate), and divide in half. Return 1 piece of dough to container, wrap tightly with plastic, and refrigerate (dough can be shaped and baked anytime within 72-hour window). Divide remaining dough in half crosswise, transfer to lightly floured rimmed baking sheet, and cover loosely with plastic. Let rest for 45 minutes.
    4. On lightly floured counter, roll each piece of dough into loose 3- to 4-inch-long cylinder; return to floured baking sheet and cover with plastic. Let rest at room temperature for 30 minutes.
    5. Lightly mist underside of couche with water, drape over inverted baking sheet, and dust with flour. Gently press 1 piece of dough into 6 by 4-inch rectangle on lightly floured counter, with long edge facing you. Fold upper quarter of dough toward center and press gently to seal. Rotate dough 180 degrees and repeat folding step to form 8 by 2-inch rectangle.
    6. Fold dough in half toward you, using thumb of your other hand to create crease along center of dough, sealing with heel of your hand as you work your way along the loaf. Without pressing down on loaf, use heel of your hand to reinforce seal (do not seal ends of loaf).
    7. Cup your hand over center of dough and roll dough back and forth gently to tighten (it should form dog-bone shape).
    8. Starting at center of dough and working toward ends, gently and evenly roll and stretch dough until it measures 15 inches long by 1 1/4 inches wide. Moving your hands in opposite directions, use back and forth motion to roll ends of loaf under your palms to form sharp points.
    9. Transfer dough to floured couche, seam side up. On either side of loaf, pinch edges of couche into pleat, then cover loosely with large plastic garbage bag.
    10. Repeat steps 4 through 9 with second piece of dough and place on opposite side of pleat. Fold edges of couche over loaves to cover completely, then carefully place sheet inside bag, and tie or fold under to enclose.
    11. Let stand until loaves have nearly doubled in size and dough springs back minimally when poked gently with your fingertip, 45 to 60 minutes. While bread rises, adjust oven rack to middle position, place baking stone on rack, and heat oven to 500 degrees.
    12. Line pizza peel with 16 by 12-inch piece of parchment paper with long edge perpendicular to handle. Unfold couche, pulling from ends to remove pleats. Gently pushing with side of flipping board, roll 1 loaf over, away from other loaf, so it is seam side down. Using your hand, hold long edge of flipping board between loaf and couche at 45-degree angle, then lift couche with your other hand and flip loaf seam side up onto board.
    13. Invert loaf onto parchment-lined peel, seam side down, about 2 inches from long edge of parchment, then use flipping board to straighten loaf. Repeat with remaining loaf, leaving at least 3 inches between loaves.
    14. Holding lame concave side up at 30-degree angle to loaf, make series of three 4-inch long, 1/2-inch-deep slashes along length of loaf, using swift, fluid motion, overlapping each slash slightly. Repeat with second loaf.
    15. Transfer loaves, on parchment, to baking stone, cover with stacked inverted disposable pans, and bake for 5 minutes. Carefully remove pans and bake until loaves are evenly browned, 12 to 15 minutes longer, rotating parchment halfway through baking. Transfer to cooling rack and let cool for at least 20 minutes before serving. Consume within 4 hours.


Technique

Making Parisian Quality Baguettes


Gentle shaping is key for authentic texture. For the best flavor, here’s what we do:
  • Add some whole-wheat flour to mimic the wheatiness of French flours
  • Use a long, cold fermentation to develop complex flavor
  • Steam the loaves under aluminum pans to create a dark and flavorful crispy crust

Baguette Baker’s Kit

Baguettes require a few specialty items, though we did find some alternatives. (You’ll also need a pizza peel and a baking stone.)
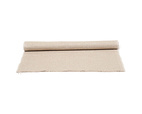
COUCHE: To proof baguettes, bakers use a heavy linen couche. It maintains the loaves’ shape while wicking away moisture, and the fabric easily releases the dough. Our favorite is the San Francisco Baking Institute 18" Linen Canvas (Couche) ($8 for a 36 by 18-inch couche). Alternatively, use a double layer of 100 percent linen tea towels at least 16 inches long and 12 inches wide.
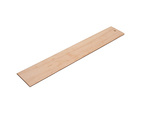
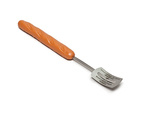
FLIPPING BOARD: To move baguettes from the couche to the oven, professional bakers use a flipping board ($12 from Breadtopia; see an example in the steps in the instructions). A homemade substitute, made by taping two 16 by 4-inch pieces of heavy cardboard together with packaging tape, works equally well.
LAME: For the proper almond-shaped slashes, with one edge that bakes up into a crispy ridge, you must cut the loaf at a low angle, something much more easily done with the curved blade of a lame. Our favorite, the Breadtopia Bread Lame ($9.50), scored baguettes perfectly (we did have to choke up a bit on the long handle), and its blades are easy to change (it came with five extras). Alternatively, an unused box cutter blade will work.
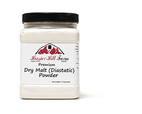
DIASTATIC MALT POWDER: During the long proofing time, nearly all the sugars in this dough are consumed by the yeast. Since sugars are responsible for browning and caramelization, this will leave the crust pale and dull-tasting. Adding diastatic malt powder, derived from a naturally occurring enzyme that converts the starches in flour into sugar, guarantees a supply of sugar at baking time and thus a crust that browns and caramelizes. Purchase diastatic malt powder (available from Amazon, $7.63 for 1 pound), not plain malt powder or malt syrup.
Share:
Read More

Slow-Roasted Chicken Parts with Shallot-Garlic Pan Sauce

Why this recipe works:

Slow roasting promises extremely juicy chicken but offers little in the way of crispy skin. We switched from a whole chicken to breasts and leg quarters so that we could easily sear the skin in a skillet and double the amount of people we could serve to eight. We left the skin wet before searing in order to promote more fond development, which we used for an easy, robust pan sauce. After searing we transferred the chicken to a wire rack set in a rimmed baking sheet and slowly roasted it at 250 degrees, ensuring even, gentle cooking throughout. A final spin under the broiler turned the rendered skin crispy and golden brown.

Slow-Roasted Chicken Parts with Shallot-Garlic Pan Sauce

The juiciest meat demands low heat; the crispiest skin, a hot sear. Could we achieve both? Watch the Video

Serves 8

To serve four people, halve the ingredient amounts.

Ingredients

  • 5 pounds bone-in chicken pieces (4 split breasts and 4 leg quarters), trimmed
  • Kosher salt and pepper
  • 1/4 teaspoon vegetable oil
  • 1 tablespoon unflavored gelatin
  • 2 1/4 cups chicken broth
  • 2 tablespoons water
  • 2 teaspoons cornstarch
  • 4 tablespoons unsalted butter, cut into 4 pieces
  • 4 shallots, sliced thin
  • 6 garlic cloves, sliced thin
  • 1 teaspoon ground coriander
  • 1 tablespoon minced fresh parsley
  • 1 1/2 teaspoons lemon juice


Instructions


  1. 1. Adjust 1 oven rack to lowest position and second rack 8 inches from broiler element. Heat oven to 250 degrees. Line baking sheet with aluminum foil and place wire rack on top. Sprinkle chicken pieces with 2 teaspoons salt and season with pepper (do not pat chicken dry).
    2. Heat oil in 12-inch skillet over medium-high heat until shimmering. Place leg quarters skin side down in skillet; cook, turning once, until golden brown on both sides, 5 to 7 minutes total. Transfer to prepared sheet, arranging legs along 1 long side of sheet. Pour off fat from skillet. Place breasts skin side down in skillet; cook, turning once, until golden brown on both sides, 4 to 6 minutes total. Transfer to sheet with legs. Discard fat; do not clean skillet. Place sheet on lower rack, orienting so legs are at back of oven. Roast until breasts register 160 degrees and legs register 175 degrees, 1 hour 25 minutes to 1 3/4 hours. Let chicken rest on sheet for 10 minutes.
    3. While chicken roasts, sprinkle gelatin over broth in bowl and let sit until gelatin softens, about 5 minutes. Whisk water and cornstarch together in small bowl; set aside.
    4. Melt butter in now-empty skillet over medium-low heat. Add shallots and garlic; cook until golden brown and crispy, 6 to 9 minutes. Stir in coriander and cook for 30 seconds. Stir in gelatin mixture, scraping up browned bits. Bring to simmer over high heat and cook until reduced to 1 1/2 cups, 5 to 7 minutes. Whisk cornstarch mixture to recombine. Whisk into sauce and simmer until thickened, about 1 minute. Off heat, stir in parsley and lemon juice; season with salt and pepper to taste. Cover to keep warm.
    5. Heat broiler. Transfer sheet to upper rack and broil chicken until skin is well browned and crisp, 3 to 6 minutes. Serve, passing sauce separately.

Share:
Read More

Israeli Couscous with Lemon, Mint, Peas, Feta, and Pickled Shallots

Why this recipe works:

To make pasta salad using Israeli couscous, we first toast the spheres in oil to bring out their nuttiness. We then cook the couscous in a measured amount of water that is soaked up during cooking. This absorption method produces more evenly cooked results than boiling the couscous. To turn the couscous into a salad, we dress it with a bold vinaigrette of equal parts acid and oil. Finally, we mix in plenty of fresh vegetables, cheese, nuts, and herbs.

Israeli Couscous with Lemon, Mint, Peas, Feta, and Pickled Shallots

These pasta pearls can revitalize a picnic salad—but first you have to cook them right. Watch the Video

Serves 6

For efficiency, let the shallots pickle while you prepare the remaining ingredients.

Ingredients

  • 1/3 cup red wine vinegar
  • 2 tablespoons sugar
  • Salt and pepper
  • 2 shallots, sliced thin
  • 3 tablespoons extra-virgin olive oil
  • 3 tablespoons lemon juice
  • 1 teaspoon Dijon mustard
  • 1/8 teaspoon red pepper flakes
  • 1 recipe Simple Israeli Couscous (see related content), cooled
  • 4 ounces (4 cups) baby arugula, roughly chopped
  • 1 cup fresh mint leaves, torn
  • 1/2 cup frozen peas, thawed
  • 1/2 cup shelled pistachios, toasted and chopped
  • 3 ounces feta cheese, crumbled (3/4 cup)

Instructions


  1. 1. Bring vinegar, sugar, and pinch salt to simmer in small saucepan over medium-high heat, stirring occasionally, until sugar dissolves. Remove pan from heat, add shallots, and stir to combine. Cover and let cool completely, about 30 minutes. Drain and discard liquid.
    2. Whisk oil, lemon juice, mustard, pepper flakes, and 1/8 teaspoon salt together in large bowl. Add cooled couscous, arugula, mint, peas, 6 tablespoons pistachios, 1/2 cup feta, and shallots and toss to combine. Season with salt and pepper to taste and transfer to serving bowl. Let stand for 5 minutes. Sprinkle with remaining 1/4 cup feta and remaining 2 tablespoons pistachios and serve.
Share:
Read More

Spanish Braised Chicken with Sherry and Saffron (Pollo en Pepitoria)

Why this recipe works:

To make pollo en pepitoria that was rich but balanced, we brightened the lush nut- and egg yolk–thickened sauce with canned tomatoes (more consistent year-round than fresh tomatoes) and a little lemon juice. Adding some of the braising liquid to the nut mixture when we blended it to make the sauce helped it puree thoroughly but still retain a pleasantly coarse consistency. Chicken thighs are fully cooked when they reach 175 degrees, but we purposely overcook them—and do it slowly—which allows collagen in the meat to break down into gelatin, making the meat more tender and juicy.
less

Spanish Braised Chicken with Sherry and Saffron (Pollo en Pepitoria)

The rich flavor and lush consistency of this classic dish from Spain’s Castilla–La Mancha region depend on a sherry-based sauce thickened with ground almonds and egg yolks. Watch the Video

Serves 4

Any dry sherry, such as fino or Manzanilla, will work in this dish. Serve with crusty bread.

Ingredients

  • 8 (5- to 7-ounce) bone-in chicken thighs, trimmed
  • Salt and pepper
  • 1 tablespoon extra-virgin olive oil
  • 1 onion, chopped fine
  • 3 garlic cloves, minced
  • 1 bay leaf
  • 1/4 teaspoon ground cinnamon
  • 2/3 cup dry sherry
  • 1 cup chicken broth
  • 1 (14.5-ounce) can whole peeled tomatoes, drained and chopped fine
  • 2 hard-cooked large eggs, peeled and yolks and whites separated
  • 1/2 cup slivered blanched almonds, toasted
  • Pinch saffron threads, crumbled
  • 2 tablespoons chopped fresh parsley
  • 1 1/2 teaspoons lemon juice

Instructions


  1. 1. Adjust oven rack to middle position and heat oven to 300 degrees.
    2. Pat thighs dry with paper towels and season both sides of each with 1 teaspoon salt and 1/2 teaspoon pepper. Heat oil in 12-inch skillet over high heat until just smoking. Add thighs and brown on both sides, 10 to 12 minutes. Transfer thighs to large plate and pour off all but 2 teaspoons fat from skillet.
    3. Return skillet to medium heat, add onion and 1/4 teaspoon salt, and cook, stirring frequently, until just softened, about 3 minutes. Add 2 teaspoons garlic, bay leaf, and cinnamon and cook until fragrant, about 1 minute. Add sherry and cook, scraping up any browned bits, until sherry starts to thicken, about 2 minutes. Stir in broth and tomatoes and bring to simmer. Return thighs to skillet, cover, transfer to oven, and cook until chicken registers 195 degrees, 45 to 50 minutes. Transfer thighs to serving platter, remove and discard skin, and cover loosely with aluminum foil to keep warm. While thighs cook, finely chop egg whites.
    4. Discard bay leaf. Transfer 3/4 cup chicken cooking liquid, egg yolks, almonds, saffron, and remaining garlic to blender jar. Process until smooth, about 2 minutes, scraping down jar as needed. Return almond mixture to skillet. Add 1 tablespoon parsley and lemon juice; bring to simmer over medium heat. Simmer, whisking frequently, until thickened, 3 to 5 minutes. Season with salt and pepper to taste.
    5. Pour sauce over chicken, sprinkle with remaining 1 tablespoon parsley and egg whites, and serve.


Technique

Picada: A Nutty Thickener


Unlike stews, sauces, and stir-fries that are thickened with starches or dairy, many Spanish stews and braises get their rich, hearty body from a pesto-like nut-based thickener called a picada. The basic formula, which many sources claim dates back to at least the 13th or 14th century, includes finely ground almonds or hazelnuts (picar means “to chop”) and seasonings like garlic, herbs, and spices. But many versions also contain toasted or fried bread or even hard-cooked egg yolks, as in the recipe here. The ingredients are traditionally pounded to a thick paste with a mortar and pestle (we use a blender for speed) and stirred into the pot toward the end of cooking so that it can lend body, richness, and flavor to the cooking liquid.

Almonds processed with garlic, saffron, and hard-cooked egg yolks add body and flavor to the braise.

Technique

Science: Overcook Your Chicken Thighs—and Do It Slowly


Unlike white meat, which dries out and toughens when overcooked, dark meat actually benefits from being cooked well beyond its doneness temperature (175 degrees). That’s because dark meat contains twice as much collagen as white meat, and the longer the meat cooks, the more that collagen breaks down into gelatin, which coats the meat’s protein fibers and makes it more moist and tender. (Dark meat also contains roughly twice as much fat, which coats the meat’s proteins, and has a higher pH, which helps it retain moisture more effectively.) But it’s also important to cook thighs low and slow so that they spend as much time as possible between 140 and 195 degrees—the temperature range in which collagen breaks down.
We proved the point by cooking two batches of chicken thighs to 195 degrees, one on the stovetop and one in a slower, gentler 300-degree oven. Whereas the stovetop-cooked thighs reached 195 degrees in about 25 minutes and were just moderately tender, the oven-cooked thighs lingered in that zone for nearly twice as long and were much more tender and pleasant to eat.

FORK-TENDER: For ultratender results, we slowly cook the chicken in the oven until it reaches 195 degrees.

Technique

Shopping: Sherry


What’s What?
Sherry, a wine fortified with brandy, can be confusing to buy because it comes in a wide range of styles such as dry, sweet, cream, and “cooking.” But for savory cooking purposes, stick with the dry kind. Sweet and cream sherries will taste overwhelmingly sweet when reduced in sauces, and cooking sherry, which has been treated with salt and preservatives to make it shelf-stable, can render a dish too salty.
Which Can I Use?
Dry sherries come in a variety of sub-classifications that represent degrees of aging and fortification—from drier, lighter-bodied, and less expensive fino to nuttier, heavier, and pricier oloroso. We’ve found that it’s fine to cook with an inexpensive fino, such as Taylor Dry Sherry ($5.99 for 750 milliliters), but if you want a bottle that’s as good to drink as it is to cook with, consider Lustau Palo Cortado Península Sherry ($19.99 for 750 milliliters).

COOKING ONLY
COOKING AND DRINKING
Share:
Read More

Simple Israeli Couscous

Why this recipe works:

We first toast the spheres in oil to bring out their nuttiness. We then cook the couscous in a measured amount of water that is soaked up during cooking. This absorption method produces more evenly cooked results than boiling the couscous.

Makes about 4 cups

The warm couscous can be tossed with butter or extra-virgin olive oil and salt and pepper for a side dish or cooled and used in a salad. If you’re making a salad, transfer the couscous to a rimmed baking sheet and let it cool completely, about 15 minutes. Our favorite brand of Israeli couscous is Roland.

Ingredients

  • 2 cups Israeli couscous
  • 1 tablespoon extra-virgin olive oil
  • 2 1/2 cups water
  • 1/2 teaspoon salt

Instructions


  1. Heat couscous and oil in medium saucepan over medium heat, stirring frequently, until about half of grains are golden brown, 5 to 6 minutes. Add water and salt; stir to combine. Increase heat to high and bring to boil. Reduce heat to medium-low, cover, and simmer, stirring occasionally, until water is absorbed, 9 to 12 minutes. Remove saucepan from heat and let stand, covered, for 3 minutes. Serve.
Share:
Read More

Braised Halibut with Leeks and Mustard

Why this recipe works:

When it comes to methods for cooking fish, braising is often overlooked. But this approach, which requires cooking the fish in a small amount of liquid so that it gently simmers and steams, has a lot going for it: As a moist-heat cooking method, braising is gentle and thus forgiving, all but guaranteeing moist, succulent fish. Plus, it makes a one-pot meal since the cooking liquid becomes a sauce, and it’s easy to add vegetables to the pan to cook at the same time. We chose halibut for its sweet delicate flavor and firm texture that made for easier handling. Because the portion of the fillets submerged in liquid cooks more quickly than the upper half that cooks through in the steam, we cook the fillets for a few minutes in the pan on just one side and then braise the fillets parcooked side up to even out the cooking. Vegetables that held their shape but cooked through quickly worked best. For the cooking liquid, wine supplemented by the juices released by the fish and vegetables during cooking delivered a sauce with balanced flavor and just the right amount of brightness. Butter gave it some much-needed richness and the right velvety texture.

Serves 4

We prefer to prepare this recipe with halibut, but a similar firm-fleshed white fish such as striped bass or sea bass that is between 3/4 and 1 inch thick can be substituted. To ensure that your fish cooks evenly, purchase fillets that are similarly shaped and uniformly thick.

Ingredients

  • 4 (6- to 8-ounce) skinless halibut fillets, 3/4 to 1 inch thick
  • Salt and pepper
  • 6 tablespoons unsalted butter
  • 1 pound leeks, white and light green parts only, halved lengthwise, sliced thin, and washed thoroughly
  • 1 teaspoon Dijon mustard
  • 3/4 cup dry white wine
  • 1 teaspoon lemon juice, plus lemon wedges for serving
  • 1 tablespoon minced fresh parsley

Instructions


  1. 1. Sprinkle fish with 1/2 teaspoon salt. Melt butter in 12-inch skillet over low heat. Place fish in skillet, skinned side up, increase heat to medium, and cook, shaking pan occasionally, until butter begins to brown (fish should not brown), 3 to 4 minutes. Using spatula, carefully transfer fish to large plate, raw side down.
    2. Add leeks, mustard, and 1/2 teaspoon salt to skillet and cook, stirring frequently, until leeks begin to soften, 2 to 4 minutes. Add wine and bring to gentle simmer. Place fish, raw side down, on top of leeks. Cover skillet and cook, adjusting heat to maintain gentle simmer, until fish registers 135 to 140 degrees, 10 to 14 minutes. Remove skillet from heat and, using 2 spatulas, transfer fish and leeks to serving platter or individual plates. Tent loosely with aluminum foil.
    3. Return skillet to high heat and simmer briskly until sauce is thickened, 2 to 3 minutes. Remove pan from heat, stir in lemon juice, and season with salt and pepper to taste. Spoon sauce over fish and sprinkle with parsley. Serve immediately with lemon wedges.


Technique

Secrets to Perfect Braised Fish


While braising fish offers a lot of appeal, it does have a downside: Because the fish is partially submerged in a small amount of cooking liquid, you are essentially half steaming, half simmering it. In tests comparing steaming halibut to completely submerging it in water and simmering it, we found that steaming took 57 percent longer. Why? For the fish to cook, molecules have to transfer their energy to the food through direct contact. Not only does simmering water generate only a small amount of steam, but many of those steam molecules condense on the lid rather than hitting, and transferring their energy to, the fish. Thus, far more molecules come in contact with the food in the simmering water than they do in the steam, making simmered food cook faster.
So it’s no surprise that in our early tests for braised fish fillets, by the time the steamed portion had cooked through, the simmered portion had overcooked.
To address this discrepancy, we parcook one side of the fillets by sautéing them briefly, and then we arrange them atop a bed of wine and vegetables, raw side down, for the braise. This gives the upper portion that cooks through more slowly by steam a jump start. The result: perfectly moist, evenly cooked fillets.

READY: Give one side of the fish a head start by cooking it gently in butter.
SET: Transfer the parcooked fillets to a plate, raw side down, while you prepare the braising liquid.
BRAISE: Cook the fish, raw side down, on a bed of vegetables and wine. The parcooked side steams more slowly, and the raw side simmers more quickly.
Share:
Read More
,

100 Percent Whole-Wheat Pancakes

Why this recipe works:

Most recipes for whole-wheat pancakes call for a mix of white and whole-wheat flours, and they also call for extra flavorings like spices, vanilla, fruit juice, or fruit. Why not just whole-wheat flour? We discovered that using all whole-wheat flour actually delivers light, fluffy, and tender pancakes—not the dense cakes you’d imagine—because whole-wheat flour contains slightly less gluten-forming protein than white flour and because the bran in whole-wheat flour cuts through any gluten strands that do form. Recipes for pancakes made with white flour advise undermixing to limit gluten development and thus avoid dense, tough pancakes, but with whole-wheat flour, gluten isn’t an issue, which all but guarantees light and tender cakes. And we didn’t see the need to cover up whole wheat’s natural flavor, the perfect complement to maple syrup, with other add-ins. As long as we used a bag of fresh or properly stored (in the freezer) whole-wheat flour, it had just the buttery, nutty flavor we wanted.

100 Percent Whole-Wheat Pancakes

Forget everything you’ve heard. The more whole-wheat flour you use, the more tender (and foolproof) the pancakes will be. Just be sure your flour is fresh. Watch the Video

Makes 15 pancakes

An electric griddle set at 350 degrees can be used in place of a skillet. If substituting buttermilk powder and water for fresh buttermilk, use only 2 cups of water to prevent the pancakes from being too wet. To ensure the best flavor, use either recently purchased whole-wheat flour or flour that has been stored in the freezer for less than 12 months. Serve with maple syrup and butter.

Ingredients

  • 2 cups (11 ounces) whole-wheat flour
  • 2 tablespoons sugar
  • 1 1/2 teaspoons baking powder
  • 1/2 teaspoon baking soda
  • 3/4 teaspoon salt
  • 2 1/4 cups buttermilk
  • 5 tablespoons plus 2 teaspoons vegetable oil
  • 2 large eggs

Instructions


  1. 1. Adjust oven rack to middle position and heat oven to 200 degrees. Spray wire rack set in rimmed baking sheet with vegetable oil spray; place in oven.
    2. Whisk flour, sugar, baking powder, baking soda, and salt together in medium bowl. Whisk buttermilk, 5 tablespoons oil, and eggs together in second medium bowl. Make well in center of flour mixture and pour in buttermilk mixture; whisk until smooth. (Mixture will be thick; do not add more buttermilk.)
    3. Heat 1 teaspoon oil in 12-inch nonstick skillet over medium heat until shimmering. Using paper towels, carefully wipe out oil, leaving thin film on bottom and sides of pan. Using 1/4-cup dry measuring cup or 2-ounce ladle, portion batter into pan in 3 places. Gently spread each portion into 4 1/2-inch round. Cook until edges are set, first side is golden brown, and bubbles on surface are just beginning to break, 2 to 3 minutes. Using thin, wide spatula, flip pancakes and continue to cook until second side is golden brown, 1 to 2 minutes longer. Serve pancakes immediately or transfer to wire rack in oven. Repeat with remaining batter, using remaining 1 teaspoon oil as necessary.


Technique

Go Ahead: Beat the Heck out of This Batter


Recipes for white-flour pancakes always warn against overmixing. That’s because it will create a strong, restrictive gluten network, and that makes for tough, dense cakes. But we discovered that the same rule doesn’t apply to pancakes made with whole-wheat flour for two reasons. The first is that cup for cup, whole-wheat flour has fewer gluten-forming proteins than white flour. Second, whole-wheat flour contains bran, which is sharp and will cut through gluten strands that do form. When the gluten strands are shorter, the gluten network is weakened and the pancakes become even more tender.

WHITE-FLOUR PANCAKES
25 stirs
100 stirs
WHOLE-WHEAT-FLOUR PANCAKES
25 stirs
100 stirs

Technique

For the Sweetest Wheat, Use Fresh Flour . . . or Grind Your Own


The little bits of bran and germ in whole-wheat flour are a nutritional boon, but they’re also a storage liability because they contain fats that are vulnerable to oxidation. If unchecked, this oxidation can give the flour a bitter taste. For the best flavor, we recommend starting with a freshly opened bag or one that you’ve stored in the freezer (where whole-wheat flour keeps well for up to a year). Or you can take it to the next level and grind your own grain. Sound hard-core? We thought so, too, until we tried it. The method is simple: Pulverize wheat berries (which are simply dried wheat kernels and widely available in the bulk section of supermarkets), sugar, and salt in a blender and then add liquid (we use buttermilk); keep blending and then add the rest of the pancake ingredients to create a batter that you can pour directly from the blender jar into the skillet. The whole process barely takes 5 minutes, and the result is the sweetest, nuttiest-tasting whole-wheat pancake you’ve ever experienced.

After testing this recipe in a range of blenders, we found that a machine with a 450-watt motor and ice-crushing capability is essential.
Share:
Read More
,

Eggs Piperade

Why this recipe works:

In our version of this Basque classic, we not only precook the pepper-tomato mixture to burn off the excess moisture, soften the peppers, and meld the flavors, but we also keep the piperade and the eggs separate until they hit the plate; this prevents acid in the produce (and the small amount of vinegar that seasons the piperade) from causing the eggs’ proteins to coagulate tightly and cook up too firm. For the peppers, we use a mix of red bell peppers and pale green Cubanelle chiles, which offer sweetness and delicate fresh flavor, respectively. By using peeled canned tomatoes (drained of most of their liquid), we avoid chewy tomato skins. A combination of high, then low, heat; lots of fat (here we use olive oil instead of dairy to boost savory flavor); and a gentle folding technique produces rich, tender eggs.
less

Eggs Piperade

A Basque-inspired sauté of sweet peppers, onions, and tomatoes can elevate simple scrambled eggs to hearty, complex fare—or leave them stringy and waterlogged. Watch the Video

Serves 4

We prefer to make this dish with Cubanelle peppers, but you can substitute green bell peppers. The eggs and the pepper mixture can be served separately, or the eggs can be gently folded into the pepper mixture, which is more traditional. Serve with crusty bread, if desired.

Ingredients

  • 6 tablespoons extra-virgin olive oil
  • 1 large onion, cut into 1/2-inch pieces
  • 1 large bay leaf
  • Salt and pepper
  • 4 garlic cloves, minced
  • 1 teaspoon minced fresh thyme
  • 2 teaspoons paprika
  • 3/4 teaspoon red pepper flakes
  • 3 red bell peppers, stemmed, seeded, and cut into 3/8-inch strips
  • 3 Cubanelle peppers, stemmed, seeded, and cut into 3/8-inch strips
  • 1 (14-ounce) can whole peeled tomatoes, drained with 1/4 cup juice reserved, chopped coarse
  • 3 tablespoons minced fresh parsley
  • 2 teaspoons sherry vinegar
  • 8 large eggs

Instructions


  1. 1. Heat 3 tablespoons oil in 12-inch nonstick skillet over medium heat until shimmering. Add onion, bay leaf, and 1/2 teaspoon salt and cook, stirring occasionally, until softened and just starting to brown, about 6 minutes. Add garlic, thyme, paprika, and pepper flakes and cook, stirring occasionally, until fragrant, about 1 minute. Add bell peppers, Cubanelle peppers, and 1 teaspoon salt; cover and cook, stirring occasionally, until peppers begin to soften, about 10 minutes.
    2. Remove cover and stir in tomatoes and reserved juice. Reduce heat to medium-low and cook, uncovered, stirring occasionally, until mixture appears dry and peppers are tender but not mushy, 10 to 12 minutes. Remove bay leaf; stir in 2 tablespoons parsley and vinegar. Season with salt and pepper to taste. Transfer pepper mixture to serving dish. Wipe out skillet with paper towels.
    3. While pepper mixture cooks, beat eggs, 2 tablespoons oil, 1/2 teaspoon salt, and 1/4 teaspoon pepper with fork until eggs are thoroughly combined and color is pure yellow.
    4. Return now-empty skillet to medium-high heat, add remaining 1 tablespoon oil, and heat until shimmering. Add egg mixture and, using rubber spatula, constantly and firmly scrape along bottom and sides of skillet until eggs begin to clump and spatula just leaves trail on bottom of pan, 30 to 60 seconds. Reduce heat to low and gently but constantly fold eggs until clumped and just slightly wet, 30 to 60 seconds. Immediately transfer eggs to serving dish with pepper mixture, sprinkle with remaining 1 tablespoon parsley, and serve. 
Share:
Read More
, ,

Chocolate Hazelnut Spread Nutella


Why this recipe works:

Toasted, skinned hazelnuts and some cocoa powder supply a nice balance of nut and chocolate flavor, while a food processor and some oil bring the two together. We also mix in some confectioners’ sugar, vanilla, and salt for sweetness and depth to create this rustic, homemade version of Nutella. In addition to the boost of nuttiness, this chocolate hazelnut spread has another advantage: coarse texture.

Chocolate Hazelnut Spread

We’re huge fans of Nutella chocolate-hazelnut spread, but as with almost anything, homemade is even better than store-bought. Watch the Video

Makes 1 1/2 cups

Ingredients

  • 2 cups hazelnuts
  • 6 tablespoons baking soda
  • 1 cup (4 ounces) confectioners' sugar
  • 1/3 cup (1 ounce) unsweetened cocoa powder
  • 2 tablespoons hazelnut oil
  • 1 teaspoon vanilla extract
  • 1/8 teaspoon salt

Instructions


  1. 1. Fill large bowl halfway with ice and water. Bring 4 cups water to boil. Add hazelnuts and baking soda and boil for 3 minutes. Transfer nuts to ice bath with slotted spoon, drain, and slip skins off with dish towel.
    2. Adjust oven rack to middle position and heat oven to 375 degrees. Place hazelnuts in single layer on rimmed baking sheet and roast until fragrant and golden brown, 12 to 15 minutes, rotating sheet halfway through roasting.
    3. Process hazelnuts in food processor until oil is released and smooth, loose paste forms, about 5 minutes, scraping down sides of bowl often.
    4. Add sugar, cocoa, oil, vanilla, and salt and process until fully incorporated and mixture begins to loosen slightly and becomes glossy, about 2 minutes, scraping down sides of bowl as needed.
    5. Transfer spread to jar with tight-fitting lid. Chocolate hazelnut spread can be stored at room temperature or refrigerated for up to 1 month.


Technique

How to Skin Hazelnuts


1. After blanching, transfer hazelnuts to ice bath using slotted spoon.

2. Drain nuts, then rub with dish towel to remove skins.
Share:
Read More
,

Vegetable Broth Base

Why this recipe works:

A good vegetable stock is an important ingredient to have on hand, but supermarket offerings don’t taste like vegetables, and traditional homemade versions are expensive and time-consuming to make. In our recipe, we grind a selection of fresh vegetables, salt, and savory ingredients to a paste that we can store in the freezer and reconstitute as needed. Leeks provide good allium flavor, and a small amount of freeze-dried onions support the fresh flavor of the leeks. Tomato paste and soy sauce provide an umami boost.

Makes about 1 3/4 cups base; enough for 7 quarts broth

For the best balance of flavors, measure the prepped vegetables by weight. Kosher salt aids in grinding the vegetables. The broth base contains enough salt to keep it from freezing solid, making it easy to remove 1 tablespoon at a time. To make 1 cup of broth, stir 1 tablespoon of fresh or frozen broth base into 1 cup of boiling water. If particle-free broth is desired, let the broth steep for 5 minutes and then strain it through a fine-mesh strainer.

Ingredients

  • 2 leeks, white and light green parts only, chopped and washed thoroughly (2 1/2 cups or 5 ounces)
  • 2 carrots, peeled and cut into 1/2-inch pieces (2/3 cup or 3 ounces)
  • 1/2 small celery root, peeled and cut into 1/2-inch pieces (3/4 cup or 3 ounces)
  • 1/2 cup (1/2 ounce) parsley leaves and thin stems
  • 3 tablespoons dried minced onions
  • 2 tablespoons kosher salt
  • 1 1/2 tablespoons tomato paste
  • 3 tablespoons soy sauce

Instructions


  1. Process leeks, carrots, celery root, parsley, minced onions, and salt in food processor, scraping down sides of bowl frequently, until paste is as fine as possible, 3 to 4 minutes. Add tomato paste and process for 1 minute, scraping down sides of bowl every 20 seconds. Add soy sauce and continue to process 1 minute longer. Transfer mixture to airtight container and tap firmly on counter to remove air bubbles. Press small piece of parchment paper flush against surface of mixture and cover. Freeze for up to 6 months.


Technique

What’s In? What’s Out? Building a Balanced Broth


The key to our concentrate was finding a combination of vegetables that produced a broth that was unobtrusive but still had enough backbone to give a dish depth and complexity.

CELERY ROOT, BUT NOT CELERY: Celery root contributes a mild yet complex celery flavor, while celery comes across as bitter and sour. Celery gets its bitter flavor from a compound called sedanolide. Celery root possesses it, too, but in lesser quantities.

LEEKS AND FREEZE-DRIED ONION, BUT NOT ONION: Onion made the stock sulfurous and sweet (and too watery). Low-moisture, low-sugar leeks are more neutral, while freeze-dried minced onions provide depth.
TOMATO PASTE, BUT NOT TOMATO: Fresh tomatoes were too mild and watery, while sun-dried tomatoes were too sweet-sour; tomato paste adds a savory depth without identifying itself.

Technique

A Broth Base You Can Freeze—and Never Thaw


Our recipe calls for 2 tablespoons of kosher salt (we use Diamond Crystal). That might seem like a lot, but once the base is diluted, it contains just 399 milligrams of sodium per 1-cup serving; commercial broth ranges from 240 to 1,050 milligrams per cup.
Furthermore, because salt depresses water’s freezing point, the concentrate will never freeze solid. This means that you can keep it in the freezer for months and scoop out exactly the amount you need without ever having to thaw it.

SCOOP AND RECONSTITUTE: Mix 1 tablespoon of base with 1 cup of boiling water.
Share:
Read More
,

Tuscan-Style Beef Stew

 Tuscan-Style Beef Stew


Tuscan beef stew (peposo), a stew made by the tilemakers of Florence's famous Santa Maria del Fiore Cathedral Duomo, is a simple stew of beef braised in wine, with loads of peppercorns and a head of garlic cloves. To improve the texture and flavor of ours without veering too far from the original, we added tomato paste and anchovies for meatiness, powdered gelatin for body, and shallots, carrots, and herbs for complexity. To ensure a full-bodied wine flavor, we add some wine at the beginning of the long braise, more before reducing the sauce, and a small amount at the end. And we did the same with the peppercorns: cracked pepper at the start, ground pepper toward the end, and more cracked pepper on serving.
less

Tuscan-Style Beef Stew

In this simple yet rich stew, just two ingredients—Chianti and black pepper—provide most of the complexity. But when you add them to the pot makes all the difference. Watch the Video

Serves 6 to 8

We prefer boneless short ribs in this recipe because they require very little trimming. If you cannot find them, substitute a 5-pound chuck roast. Trim the roast of large pieces of fat and sinew, and cut it into 2-inch pieces. If Chianti is unavailable, a medium-bodied wine such as Côtes du Rhône or Pinot Noir makes a nice substitute. Serve with polenta or crusty bread.

Ingredients

  • 4 pounds boneless beef short ribs, trimmed and cut into 2-inch pieces
  • Salt
  • 1 tablespoon vegetable oil
  • 1 (750-ml) bottle Chianti
  • 1 cup water
  • 4 shallots, peeled and halved lengthwise
  • 2 carrots, peeled and halved lengthwise
  • 1 garlic head, cloves separated, unpeeled, and crushed
  • 4 sprigs fresh rosemary
  • 2 bay leaves
  • 1 tablespoon cracked black peppercorns, plus extra for serving
  • 1 tablespoon unflavored gelatin
  • 1 tablespoon tomato paste
  • 1 teaspoon anchovy paste
  • 2 teaspoons ground black pepper
  • 2 teaspoons cornstarch

Instructions


  1. 1. Toss beef and 1 1/2 teaspoons salt together in bowl and let stand at room temperature for 30 minutes. Adjust oven rack to lower-middle position and heat oven to 300 degrees.
    2. Heat oil in large Dutch oven over medium-high heat until just smoking. Add half of beef in single layer and cook until well browned on all sides, about 8 minutes total, reducing heat if fond begins to burn. Stir in 2 cups wine, water, shallots, carrots, garlic, rosemary, bay leaves, cracked peppercorns, gelatin, tomato paste, anchovy paste, and remaining beef. Bring to simmer and cover tightly with sheet of heavy-duty aluminum foil, then lid. Transfer to oven and cook until beef is tender, 2 to 2 1/4 hours, stirring halfway through cooking time.
    3. Using slotted spoon, transfer beef to bowl; cover tightly with foil and set aside. Strain sauce through fine-mesh strainer into fat separator. Wipe out pot with paper towels. Let liquid settle for 5 minutes, then return defatted liquid to pot.
    4. Add 1 cup wine and ground black pepper and bring mixture to boil over medium-high heat. Simmer briskly, stirring occasionally, until sauce is thickened to consistency of heavy cream, 12 to 15 minutes.
    5. Combine remaining wine and cornstarch in small bowl. Reduce heat to medium-low, return beef to pot, and stir in cornstarch-wine mixture. Cover and simmer until just heated through, 5 to 8 minutes. Season with salt to taste. Serve, passing extra cracked peppercorns separately. (Stew can be made up to 3 days in advance.)


Technique

Cheap Wine is Fine


Early recipes for peposo relied on inexpensive Chianti, while modern versions call for a midpriced bottle (whether Chianti or a similar Tuscan wine such as Montepulciano or Brunello). We made batches using cheap ($5), midpriced ($12), and pricey ($20) Chianti, along with other varieties we often use in the kitchen: Cabernet Sauvignon, Pinot Noir, and Côtes du Rhône.
We were surprised that the stew made with the cheapest Chianti went over well with most tasters. While the midpriced wine was agreeable to everyone, there was no advantage to cooking with the expensive bottle. Highly oaked, tannic wines like Cabernet became harsh when cooked, but cheap bottles of fruitier pinot and Côtes du Rhône made good stand-ins for the Chianti.

Technique

Maximizing the Flavors from Wine and Pepper


The flavor compounds in wine and pepper can be classified by their behavior during cooking. Stable compounds don’t change, but volatile compounds evaporate, and unstable compounds break down. Over time, the result is a loss of flavor. Most recipes we found for this stew call for adding all the wine and pepper at once, at the start of a 2 1/2-hour simmer. At the end of cooking, the flavors remaining were only those of the stable compounds. By adding some of the wine and pepper 15 minutes before finishing cooking, and the remainder of wine and pepper at the end, we were able to preserve more of the volatile and unstable compounds, capturing the most fleeting, bright, fresh flavors from both the wine and the pepper.

OTHER STEWS: LESS FLAVOR
All the wine and pepper are added at the start, so many of the compounds break down or dissipate by the end of the long simmer.
TRIANGLES: Volatile compounds evaporate
CIRCLES: Unstable compounds break down
SQUARES: Stable compounds remain
OUR STEW: MORE FLAVOR
We add wine and pepper in three stages to guarantee full flavor contributions from all three types of compounds.
Share:
Read More
,

Foolproof New York Cheesecake

Why this recipe works:

The classic New York Cheesecake owes its distinctive browned top and velvety texture to a risky baking technique. It spends 10 minutes in a 500-degree oven, after which the oven is turned down to 200 degrees for the remainder of the baking time. Success with this method is dependent on the oven temperature falling at a very specific rate: too fast and your cheesecake will be soupy; too slow and it will be burned, cracked, and grainy.
For success every time, we turned the conventional method on its head: We baked the cheesecake for about 3 hours at the lower temperature and then removed it from the oven while we heated the oven to 500 degrees. Finishing the cake at the higher temperature produced the proper appearance and texture, without the risk. A hybrid graham cracker/shortbread crust gave our cheesecake the classic flavor and the structure to withstand prolonged contact with the wet filling without turning soggy, for a perfect cheesecake every time.
less

Foolproof New York Cheesecake

Our recipe produced lush texture and a beautiful brown top—but not for everyone. To solve this mystery, we had to delve into the secrets of ovens. Watch the Video

Serves 12 to 16

This cheesecake takes at least 12 hours to make (including chilling), so we recommend making it the day before serving. An accurate oven thermometer and instant-read thermometer are essential. To ensure proper baking, check that the oven thermometer is holding steady at 200 degrees and refrain from frequently taking the temperature of the cheesecake (unless it is within a few degrees of 165, allow 20 minutes between checking). Keep a close eye on the cheesecake in step 5 to prevent overbrowning.

Ingredients

  • Crust
  • 6 whole graham crackers, broken into pieces
  • 1/3 cup packed (2 1/3 ounces) dark brown sugar
  • 1/2 cup (2 1/2 ounces) all-purpose flour
  • 1/4 teaspoon salt
  • 7 tablespoons unsalted butter, melted
  • Filling
  • 2 1/2 pounds cream cheese, softened
  • 1 1/2 cups (10 1/2 ounces) granulated sugar
  • 1/8 teaspoon salt
  • 1/3 cup sour cream
  • 2 teaspoons lemon juice
  • 2 teaspoons vanilla extract
  • 6 large eggs plus 2 large egg yolks

Instructions


  1. 1. FOR THE CRUST: Adjust oven racks to upper-middle and lower-middle positions and heat oven to 325 degrees. Process cracker pieces and sugar in food processor until finely ground, about 30 seconds. Add flour and salt and pulse to combine, 2 pulses. Add 6 tablespoons melted butter and pulse until crumbs are evenly moistened, about 10 pulses. Brush bottom of 9-inch springform pan with 1/2 tablespoon melted butter. Using your hands, press crumb mixture evenly into pan bottom. Using flat bottom of measuring cup or ramekin, firmly pack crust into pan. Bake on lower-middle rack until fragrant and beginning to brown around edges, about 13 minutes. Transfer to rimmed baking sheet and set aside to cool completely. Reduce oven temperature to 200 degrees.
    2. FOR THE FILLING: Using stand mixer fitted with paddle, beat cream cheese, 3/4 cup sugar, and salt at medium-low speed until combined, about 1 minute. Beat in remaining 3/4 cup sugar until combined, about 1 minute. Scrape beater and bowl well; add sour cream, lemon juice, and vanilla and beat at low speed until combined, about 1 minute. Add egg yolks and beat at medium-low speed until thoroughly combined, about 1 minute. Scrape bowl and beater. Add whole eggs two at a time, beating until thoroughly combined, about 30 seconds after each addition. Pour filling through fine-mesh strainer set in large bowl, pressing against strainer with rubber spatula or back of ladle to help filling pass through strainer.
    3. Brush sides of springform pan with remaining 1/2 tablespoon melted butter. Pour filling into crust and set aside for 10 minutes to allow air bubbles to rise to top. Gently draw tines of fork across surface of cake to pop air bubbles that have risen to surface.
    4. When oven thermometer reads 200 degrees, bake cheesecake on lower rack for 45 minutes. After 45 minutes, remove cake from oven and use toothpick to pierce any bubbles that have risen to surface. Return to oven and continue to bake until center registers 165 degrees, 2 1/4 to 2 3/4 hours longer. Remove cake from oven and increase oven temperature to 500 degrees.
    5. When oven is at 500 degrees, bake cheesecake on upper rack until top is evenly browned, 4 to 12 minutes. Let cool for 5 minutes; run paring knife between cheesecake and side of springform pan. Let cheesecake cool until barely warm, 2 1/2 to 3 hours. Wrap tightly in plastic wrap and refrigerate until cold and firmly set, at least 6 hours. (Leftovers can be refrigerated for up to 4 days.)
    6. To unmold cheesecake, remove sides of pan. Slide thin metal spatula between crust and pan bottom to loosen, then slide cheesecake onto serving plate. Let cheesecake stand at room temperature for about 30 minutes. To slice, dip sharp knife in very hot water and wipe dry between cuts. Serve.


Technique

Four Familiar Failures


A nut-brown surface, puffed-up rim, velvety interior, and buttery graham cracker crust are classic New York cheesecake traits. Unfortunately, so are these common pitfalls.

CRACKED: When exposed to high heat for too long, the cheesecake will overbake and develop unsightly fissures.
BURNT: Too much high heat can also cause the cheesecake to burn.
SPOTTY: Air bubbles that rise to the batter’s surface during baking brown faster, giving the facade an undesirably mottled appearance.
SOUPY: Even when the exterior is nicely set, the interior can be underdone and runny at the core.

Technique

Problem Solving: A Crust That Won’t Sog Out


A typical graham cracker crust turns soggy because the structure of the crushed-up crackers is loose and porous. As a result, moisture from the heavy, wet cream cheese filling seeps into the crevices and saturates the crumbs before the water has a chance to evaporate during baking.
The key to a more moisture-resistant crust was to “waterproof ” the crumbs, which we did by working them into a pastry dough. Because the structure of pastry dough is much less porous than a crumb crust—picture a sheet of rock versus the absorbent “sand” of a crumb crust—water from the filling never soaks into it and simply evaporates in the oven. Furthermore, our pastry dough contains a high ratio of butter, which coats both the crumbs and the starch granules in the flour, making the dough even more resistant to soaking up water.

WATERPROOF CRUST: Graham cracker crumbs don't get soggy when worked into a moisture-resistant pastry dough.

Technique

Baker Beware: Ovens Cool Down at Different Rates


The textural and visual contrast that defines a New York cheesecake is typically produced by a high-to-low oven method: an initial blast of heat that puffs the sides and browns the top before the temperature is turned way down for the duration of baking to ensure just the right velvety interior. But baking cheesecakes in a variety of test kitchen ovens made us realize that this method works only in ovens that lose heat at a particular rate. If the oven is more thoroughly insulated and the temperature falls too slowly, the cheesecake will overcook; if the oven is less well insulated and the temperature falls too quickly, the beautifully browned exterior of the cheesecake is likely to hide a soupy, raw interior.
We confirmed this theory after monitoring the time it took three different ovens in the test kitchen to fall from 500 to 200 degrees. The results were all over the map. Even more compelling was that in the slowest oven, the temperature took almost 2 hours to reach 200 degrees—45 minutes longer than the recommended baking time for our previous recipe for New York–Style Cheesecake.
THE SOLUTION: To eliminate the drop in oven temperature as a variable, we took the bold step of reversing the typical high-to-low method. We baked the cake in a 200-degree oven until it was completely set, removed it, and then cranked the heat to 500 degrees. Once the oven came up to temperature, we placed the cake on the upper rack, where in just 10 minutes the top browned and the edges puffed, creating that characteristic slope from edge to center.
Share:
Read More